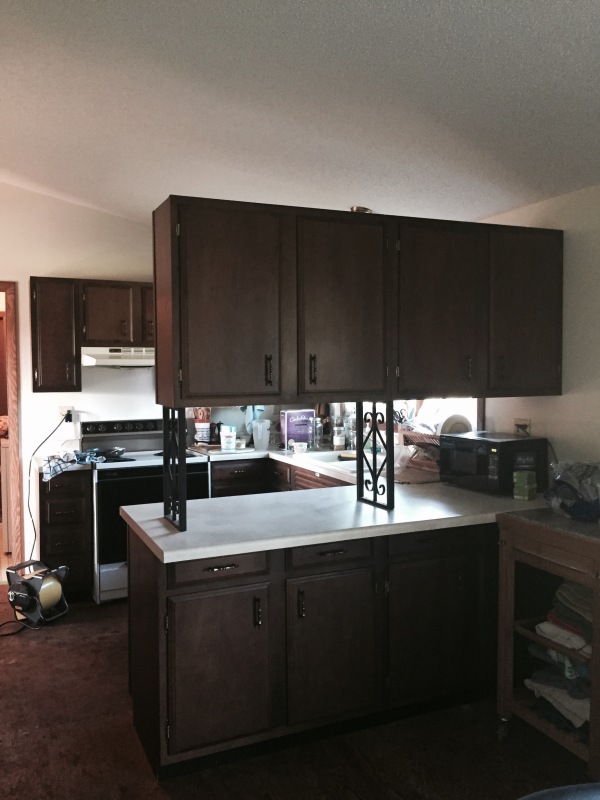
It’s Friday! Word of warning, this is a wordy post (Pun intended!). So remember this room? Yeah, I know it looks pretty awful here, but this the original Kitchen when we moved in.
Granted, in this picture Zach was using it as command central for his great gardening experiment of 2014, and for pretty much every other project around the house before we lived there. But you get the picture. Our kitchen is small and needs some updating badly.
 My main beef with the kitchen comes down to two things; the actual room that houses the kitchen and dining room is a spacious and the length of half of the house, yet the kitchen is a tiny little U-shap on one side, leaving the bulk of the room for the dining area. Second beef is the upper cabinets pictured above.
 You can see in this picture that although the counter they are resting on is large enough to provide a good prep space in the kitchen, the upper cabinets are sitting too low and in the middle of the lower countertop. This wiped out the largest section of free counter in the kitchen and rendered it basically useless, merely a resting place for food as I transported it from the refrigerator to the small corner wedged between the sink and the stove.
 All of my cooking has been done on this little section of counter top. Proximity to the stove plays into this, but also this is the only semi-large spot where I can actually have an unobstructed view of what I am doing in our kitchen.
As soon as we bought the house I knew I was going to redo the kitchen. Zach and I did some preliminary pricing at Lowe’s to get an idea of what we were looking at as far as cost. As I perused through the myriad of wood cabinet options I was so conscious of price that I was very conservative in my choices. I prefer kitchens that are painted and the only non stain-ed option they had was black or white, and the different door options were all very basic and nothing really stood out to me. Zach told me to choose exactly what I liked so we could at least get a starting figure and then go from there, but the problem was I didn’t really like anything they had to choose from.
When everything was selected and designed I had a kitchen of which the cabinets I didn’t really love, the layout was scrabbled together, and the price tag was over $15,000. The kitchen designer assured us that the price was only for face value and did not include the different sales and promotions that were going on at any given time. I was not ok with that price considering I didn’t even really LOVE the plans we took away. Perhaps dropping that much would have been viable had it been my dream kitchen.
I turned to Ikea and redesigned a couple of kitchen options to see what their price difference was. The total hovered right around $8000, which considering that the end result would have been something a I liked style-wise much more than the Lowe’s option, was much more reasonable. But still, too much for us at the moment.
I talked to my Aunt who is a design ninja and she urged me to at least paint the existing kitchen so that I could be happier with it in the mean time, and I could play around with things in a way that I wouldn’t do with a new one. I perused through kitchen images that stood out to me I realized that not only was she right, but that more than a new kitchen I wanted to make my existing one work for a couple of reasons. The first reason was if I were to buy a new kitchen I would play it safe and choose something that maybe I didn’t LOVE but that would be beautiful and guaranteed to be timeless and provide good resale for the house. I don’t want to be safe with this kitchen, I want to be daring; the only way I will be daring is if I am working with what I already have, because ultimately if I hate it, I am only back at where I was in the beginning with the option of a whole new one.
The second reason was that the more money devoted to the renovation the longer it would take for us to actually get around to completing it. I enjoy the challenge of creating a beautiful space on a tiny budget (don’t get me wrong, I would love to have a larger budget if I could). With having a small budget I think outside the box more and am far more creative than I would be otherwise. Having only a tiny investment in something gives one the courage to be daring because if it fails (which it seems for me rarely to happen. I frequently love the results) I am not out much other than my time.
All that to say I have decided to work with what I have, and the first step was getting rid of that upper section of cabinets. It proved as simple as removing three screws and one odd nail from the wall, four screws from the base, and the help of my sister-in-law to lift it down and carry it to the basement. The results are dramatic.
Before….
 It has totally changed the space. I am so happy with the results, that if it weren’t for the problem of needing a space for a dishwasher, I would almost just leave the kitchen as it is now. It opens up the room so much to light and gives me a huge section of functional counter-space now. Since taking it down, I have been able to add decor touches to the room (including the gallery wall on the far end) and I simply love spending time here.
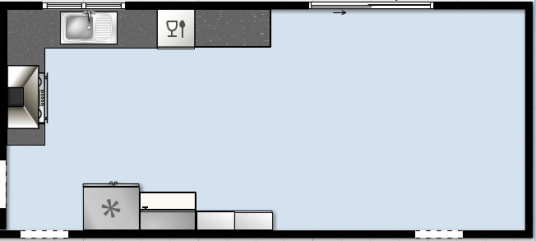
My plants are happy about having more light. As for the future, I have worked out a floor plan and I can’t wait to get started on the project, although it likely wont be for several months.


I knew taking down that set of cabinets would be a dramatic transformation, and it certainly is! Now, you should hang some open shelving where that orange rectangle is and you’ll be right on style with current kitchen trends.
LikeLike
I want to do some open shelving in that exact spot!
LikeLike